

You can avoid a failed air tightness test, most of the time, by preparing properly. Here are the ten most common reasons a test fails, and how to avoid each one.
When a dwelling fails an air tightness test, our tester uses diagnostic techniques to identify the main leakage pathways, which get recorded in the failure report. Based on the patterns we see most often across our testing, these are the worst-offending air leakage pathways.
10 Most Common Failed Air Tightness Test Reasons
- In and around the skirting boards
- The window and door surrounds
- In and around the ceilings/suspended floors
- Behind and around the baths, toilets and sinks
- Behind the kitchen cabinets
- Bathroom and kitchen ventilation extracts
- Riser and Services cupboards
- Around and through Loft hatches
- Around and through electrical fittings
- Chimneys and fireplaces
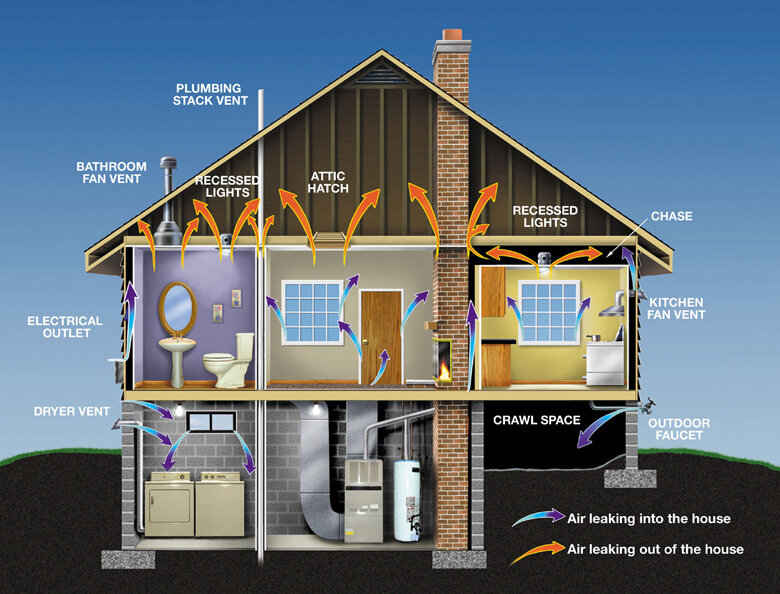
To prevent the majority of failures in air tightness tests, it is crucial to prepare the dwelling adequately before the arrival of the air tester. This entails thoroughly going through our air tightness checklist on-site and ensuring proper sealing of all unregulated air leakage pathways.
What’s next?
Most of these ten reasons come down to the same thing: a gap that was easy to reach before the finishes went in and hard to reach afterwards. Catching them early is what actually gets a dwelling through first time. Our team of skilled engineers works across new construction, residential, commercial and retrofit projects.
If you’d like help preparing for a test or interpreting a failure report, we’re happy to talk it through.